
- MacOS - Home
- Mac - Factory Reset
- Mac - Erase Assistant Not Supported
- Mac - Update macOS
- Mac - iMessage not working on Mac
- Mac - Rename a Screenshot
- Mac - Password Protect Folder
- Mac - Turn Off Sleep Mode
- Mac - Migration Assistant not Working
- Mac - Remove Background from Images
- Mac - Scan QR Codes
- Mac - Change Folder Color
- Mac - Alternatives to Notepad++
- Mac - Fix Screen Lines
- Mac - Update Roblox
- Mac - Recover Deleted Files
- Mac - Convert HEIC to JPG
- Mac - Take Screenshots
- Mac - PDFs to Word Docs
- Mac - Open & Use Emoji Keyboard
- Mac - ~/Library Folder
- Mac - Uninstalling Programs
- Fix 'MacBook Keyboard Not Working' Issue
- Fix If Touch Bar Not Working
- Mac - Check Storage
- Convert Screenshot to PDF
- Mac - Fix MacBook Pro Trackpad Not Working
- Fix Your Account has been Disabled in App Store and iTunes
- iPhone - Delete Wallpaper
- Mac - Show ~/Library Folder
- iPhone: How To & User Guide
- iPhone - Configure Proxy
- iPhone - Factory Reset
- iPhone - Fix Charging Issue
- iPhone - How To Backup
- iPhone - Retrieve Deleted Messages
- iPhone - Clear Cookies & Cache
- iPad: How To & Guides
- iPad - Free Up Storage
How to Password Protect a Folder on MacBook?
Securing your personal data in a folder no one can touch is very important nowadays, especially when using a shared device. It may be personal data or important documents from work that you need to protect from other users of your Macbook. Though you cannot find any direct feature from macOS that password protects your folder, there is an indirect method that you can use.
The Disk Utility feature of macOS allows users to create an encrypted disk image. This can be locked behind a password that cannot be easily bypassed. This encrypted folder's password protects it from access by others.
Here is how to password protect a folder on a MacBook.
How to Password Protect a Folder on MacBook?
You can create a password protected, encrypted copy of your data on a MacBook. The macOS’s built-in Disk Utility feature is employed for this task. It will archive the folder with the .dmg extension, and adding AES encryption will password protect the folder.
Here is a step-by-step process to password protect a folder on a MacBook −
Step 1: Open Disk Utility
Open spotlight (command + space). Type "Disk Utility" and hit enter.

Step 2: Create a Disc Image
Click on File → new image → Image from a folder.
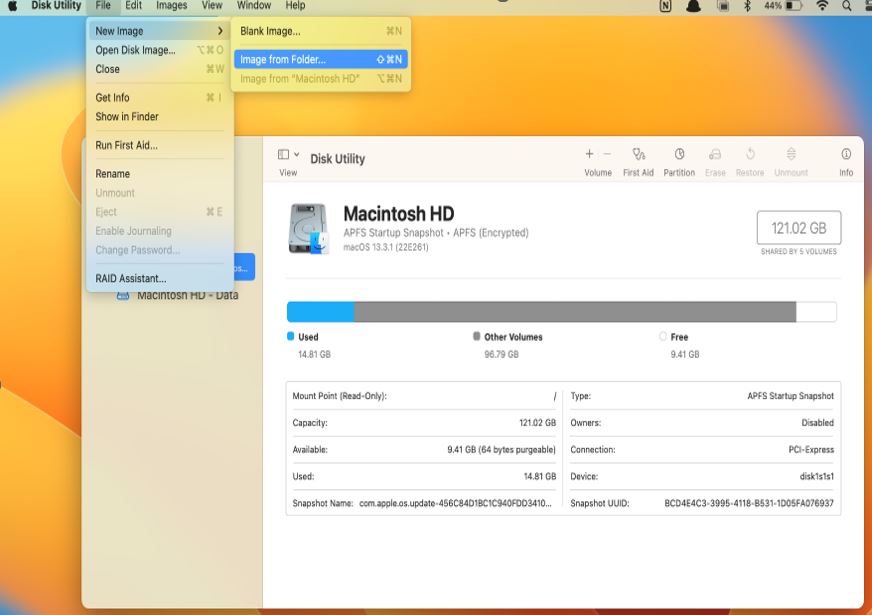
Step 3: Add Folder
Select the folder you want to password protect. Name the file and choose the encryption to 256-bit AES encryption. As soon as you choose it, you will be prompted to create the password.
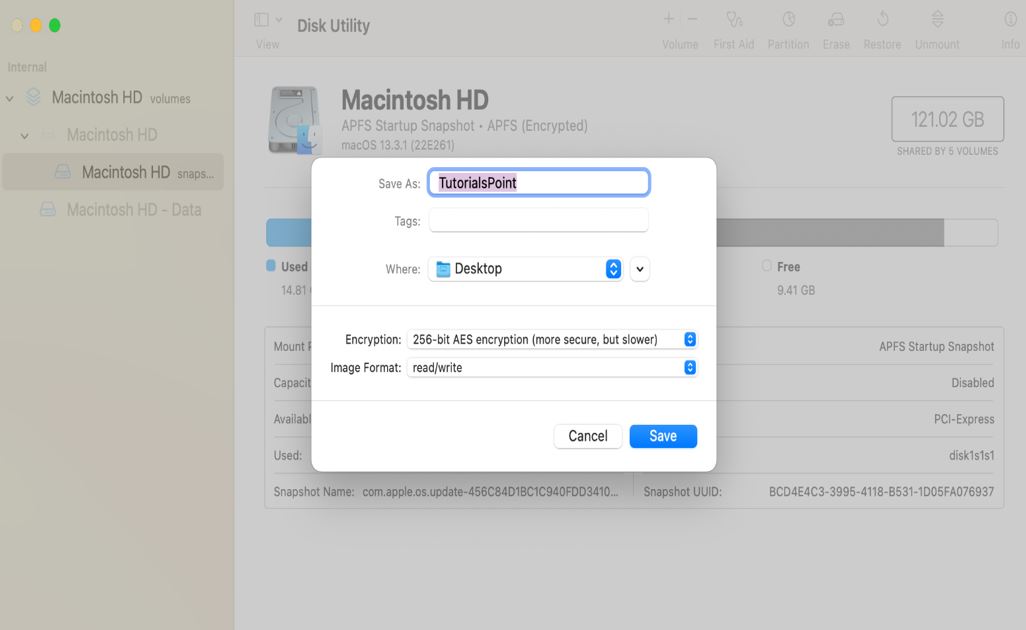
Step 4: Add Password
Add password and click save. In image format choose, read-only if you don't need to update contents otherwise choose read/write.
Step 5: Save to Create Encrypted Folder
Click on save to create the encrypted folder. This will create a .dmg extension File and the location you mentioned.
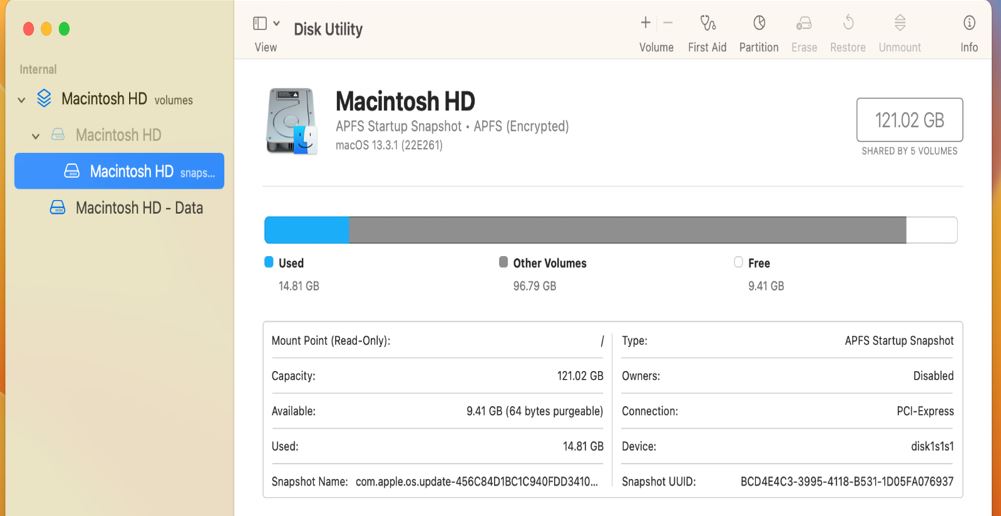
This will create your password-protected file. Now to access the content of this folder, you need to put on the password that you have created. Here is how you can access the newly created encrypted folder on a MacBook.
The newly created password protected folder is a copy of the original folder that you have fed it. The file is still in your system, and you have to physically delete the file in order to make your file's content available for other users.
Accessing Password Protected Folder on MacBook
Accessing a password-protected folder is the same as accessing any other folder on your MacBook.
Go to the folder, click on the .dmg file, enter the password, and click OK.
If you have entered the correct password, the file will be open, and you will be able to access the contents; otherwise, the folder will not open.
Warning
Be cautious while you enter your password, write something that you will remember; otherwise, you might have the chance of losing data if you forget your password. The encrypted file cannot be decrypted back to its original form in case you forgot your password.
You can also password protect data as files using MacBook’s built-in software, like notes, pages, numbers, and keychains. These passwords protected files can store data like text, images, etc. as files.
Password Protected Notes
Apple's Notes is a software that allows you to write and do things on the go. There are many features, like adding text, scanning documents and images, etc. You can lock your notes saved in your notes application.
The following are the steps to protect notes through passwords −
- Open the notes app (command + space → notes → enter).
- Click on Create a new note and add the content you need to be added to it.
- Click on the lock icon to lock your note. This will add a lock icon using the password provided. You might be prompted to add a password or enter a password.
Unlocking Notes
To unlock the note, click again on the lock icon and enter the password to unlock it.
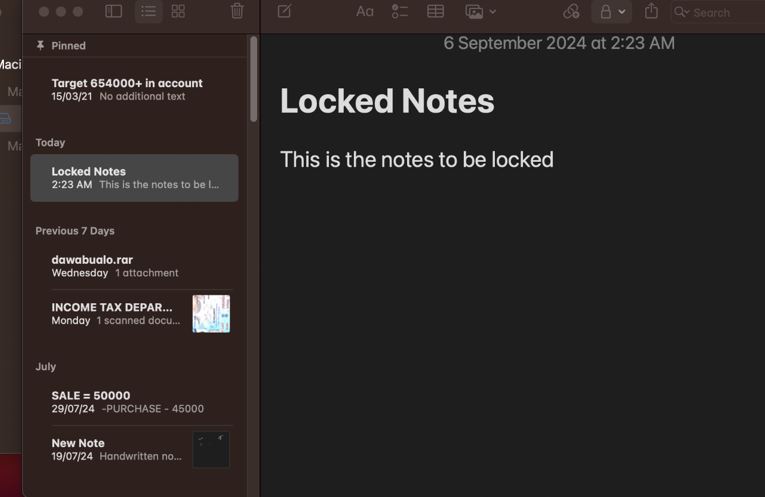
Password Protect Pages File
Apple pages are just like Microsoft Docs is software used to create text-based files. It also has a feature to lock files if needed by the user.
The following are the steps to lock pages file −
- Open a new page or create a new one and add data.
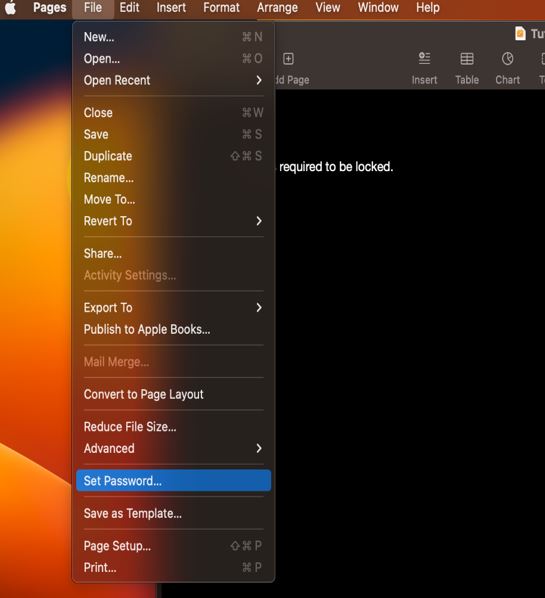
- Click on file → set password.
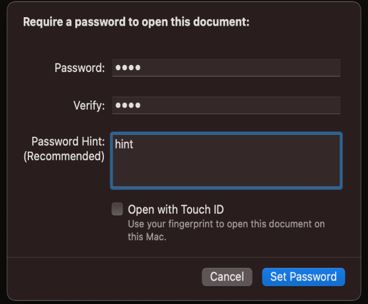
- Here, you will be prompted to add a password and hint. Add your password and click on set password.
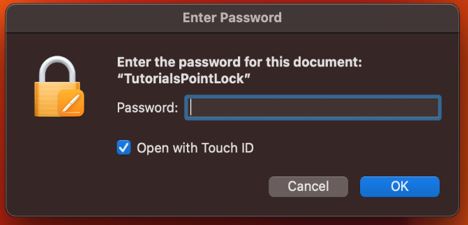
- Click open the file; you will be prompted to enter a password. Once you enter the right password, you will access the file.
Both of these methods can be used to lock individual files on a Macbook. And if you need multiple files to be locked, the password-protect folder can be used.