- PyQt - Home
- PyQt - Introduction
- PyQt - Environment
- PyQt - Hello World
- PyQt - Major Classes
- PyQt - Using Qt Designer
- PyQt - Meta Objects
- PyQt Signals & Slots
- PyQt - Signals and Slots
- PyQt - Support and Signals
- PyQt - Unbound and Bound Signals
- PyQt - New Signals with PyQtSignal
- PyQt - Connecting, Disconnecting, & Emitting Signals
- PyQt - Slot decorator
- PyQt - Slot Connection
- PyQt Layouts
- PyQt - Layout Management
- PyQt - QBoxLayout
- PyQt - QGridLayout
- PyQt - QFormLayout
- PyQt - QHBoxLayout
- PyQt - QVBoxLayout
- PyQt - QStackedLayout
- PyQt - QGraphicsGridLayout
- PyQt - QGraphicsAnchorLayout
- PyQt - QGraphicsLayout
- PyQt - QGraphicsLinearLayout
- PyQt Basic Widgets
- PyQt - Basic Widgets
- PyQt - Qlabel Widget
- PyQt - QLineEdit Widget
- PyQt - QPushButton Widget
- PyQt - QRadioButton Widget
- PyQt - QCheckBox Widget
- PyQt - QComboBox Widget
- PyQt - QSpinBox Widget
- PyQt - QMessageBox
- PyQt - QDialogButtonBox Widget
- PyQt - QFontComboBox Widget
- PyQt - QDoubleSpinBox Widget
- PyQt - QToolBox Widget
- PyQt - QMenuBar, QMenu & Qaction Widgets
- PyQt - QToolTip
- PyQt - QInputDialog Widget
- PyQt - QFontDialog Widget
- PyQt - QDialog Widget
- PyQt - QFileDialog Widget
- PyQt - QTab Widget
- PyQt - QSplitter Widget
- PyQt - QDock Widget
- PyQt - QStatusBar Widget
- PyQt - QTabBar
- PyQt - QList Widget
- PyQt - QScrollBar Widget
- PyQt - QProgressBar
- PyQt - QCalendar Widget
- PyQt - QMessageBox Widget
- PyQt - QPlainTextEdit
- PyQt - QDateEdit
- PyQt - QDateTimeEdit
- PyQt - QTimeEdit
- PyQt - QTextEdit
- PyQt - QTextBrowser
- PyQt - QScrollArea
- PyQt - Drag and Drop
- PyQt - Multiple Document Interface
- PyQt - QDialog Class
- PyQt Views
- PyQt - QColumnView
- PyQt - QTableView
- PyQt Drawing API
- PyQt - Drawing API
- PyQt - Drawing a Line
- PyQt - Drawing a Rectangle
- PyQt - Drawing a Triangle
- PyQt - Drawing a Circle
- PyQt - Drawing a Ellipse
- PyQt - Drawing a Polygon
- PyQt - Geometric Transformation
- PyQt - Drawing Effect
- PyQt Groups
- PyQt - QButtonGroup
- PyQt - QGroupBox
- PyQt Effects
- PyQt - Effects
- PyQt - Opacity Effect
- PyQt - QGraphicsBlur Effect
- PyQt - QGraphicsColorize Effect
- PyQt - QGraphicsDropShadow Effect
- PyQt Events
- PyQt - Event Handling
- PyQt - Drag & Drop Events
- PyQt - File Open Event
- PyQt - Action Event
- PyQt - Hide Event
- PyQt - Resize Event
- PyQt Database
- PyQt - Database Handling
- PyQt Essentials
- PyQt - BrushStyle Constants
- PyQt - QClipboard
- PyQt - QPixmap Class
- PyQt Useful Resources
- PyQt - Quick Guide
- PyQt - Useful Resources
- PyQt - Discussion
PyQt - Effect
The effect in PyQt develops a desktop application with a graphical user interface(GUI). This effect can be illustrated through scenarios like data visualization tools, interactive applications, and customized software based on requirements.
The PyQt effect creates a user-friendly application across various domains such as finance software, employment tools, trading platforms, etc.
We have the following standard effect in PyQt −
- QGraphicsBlurEffect − The items blur by a given radius.
- QGraphicsDropShadowEffect − This adds a dropshadow effect behind the item.
- QGraphicsColorizeEffect − This item renders the shades for any given color.
- QGraphicsOpacityEffect − The item is rendered with an opacity.
In contrast to the GUI effect, a developer can use the standard effect with QGraphicsItem. So, we can create a subclass of the QGraphics Effect. This effect can be installed using the method setGraphicsEffect().
Custom Effect in PyQt
The custom effect can be created using QGraphicsEffect, below is the list of steps that help you to understand this.
Step 1 − Create a new class that inherits from the class QGraphicsEffect. This class is considered a custom effect.
Step 2 − Implement the virtual function using draw() method. The draw() accepts the painter as a parameter and allows the developer to modify the custom visual effect.
Step 3 − To achieve the desired effect, we can call the method sourcePixmap() to obtain a pixmap for the graphics effect. This can be executed within the draw() method.
Step 4 − Use the update method to request a redraw.(This step is required when the effect changes dynamically)
Example
Following example illustrate the custom effect in PyQt using various classes and methods.
from PyQt5.QtWidgets import QApplication, QGraphicsView, QGraphicsScene,
QGraphicsPixmapItem, QGraphicsEffect, QWidget
from PyQt5.QtGui import QPixmap, QPainter, QColor
from PyQt5.QtCore import Qt

class CustomGraphicsEffect(QGraphicsEffect):
   def __init__(self):
      super().__init__()

   def draw(self, painter: QPainter):
      # Obtain the source pixmap
      source_pixmap, _ = self.sourcePixmap(Qt.DeviceCoordinates)

      # Apply custom modifications to the pixmap (add RGB color)
      modified_pixmap = QPixmap(source_pixmap)
      painter.begin(modified_pixmap)
      painter.setCompositionMode(QPainter.CompositionMode_SourceIn)
      painter.fillRect(modified_pixmap.rect(), QColor(0, 255, 255, 100))
      painter.end()

      # Set the modified pixmap as the output
      self.drawSource(painter)

if __name__ == "__main__":
   app = QApplication([])

   # Create a QWidget to hold the QGraphicsView
   widget = QWidget()
   widget.setWindowTitle("Custom Graphics Effect Example")
   widget.setGeometry(100, 100, 800, 600)

   # Create a QGraphicsView and scene
   view = QGraphicsView(widget)
   scene = QGraphicsScene()
   view.setScene(scene)

   # Load an image (replace with your image path)
   image_path = "C:/Users/Lenovo/Downloads/tutorialspoint.png"
   pixmap_item = QGraphicsPixmapItem(QPixmap(image_path))
   # Apply the custom effect
   pixmap_item.setGraphicsEffect(CustomGraphicsEffect())
   scene.addItem(pixmap_item)

   widget.show()
   app.exec_()
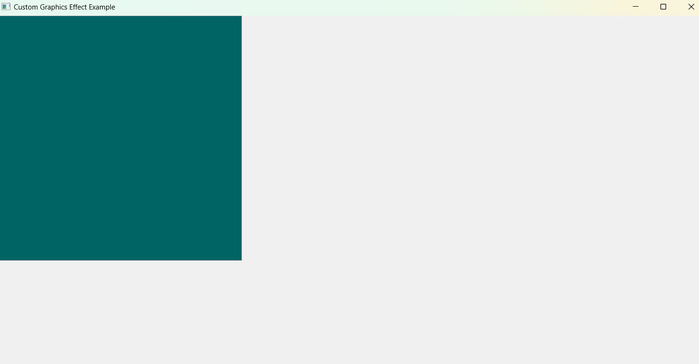
Output
The above code produces the following output −
Optimization Techniques in PyQt Effect
Optimization plays a crucial role in GUI frameworks, like PyQt and Tkinter, based on application requirements.
Below are some key strategies for optimizing the performance of QGraphicsEffect.
- The effects are disabled, and the source is rendered directly without any modifications.
- The method sourceIsPixmap() can be helpful for the optimization process. It allows the developer to check whether the source is an image or other item.
- While creating custom effects, we must follow the best possible solution for efficient rendering practices such as CPU load, memory usage, and GPU capabilities.
Troubleshooting and Tips in PyQt Effect
When we are working with the PyQt program on QGraphicsEffect, we might encounter some common issues. So, here we have some tips and techniques for debugging and optimization in PyQt application.
We can use standard debugging techniques like print statements and breakpoints. Thus, this identify the issue to our custom effect code.
Use custom effect to change the source of bounding rectangle. For example- if the source is a QGraphicsRectItem and its parameters have changed.
Advantages of GUI in PyQt
Following points to understand the advantage of GUI in PyQt −
- Graphical User Interface(GUI) is designed for easier interaction between users and computers.
- GUI performs the productivity of tasks.
- Users can easily navigate to GUI features with its uses.
- GUI gives clarity to the software.
- GUI frameworks and libraries bring multiple advantages to the software development process.