- PyQt - Home
- PyQt - Introduction
- PyQt - Environment
- PyQt - Hello World
- PyQt - Major Classes
- PyQt - Using Qt Designer
- PyQt - Meta Objects
- PyQt Signals & Slots
- PyQt - Signals and Slots
- PyQt - Support and Signals
- PyQt - Unbound and Bound Signals
- PyQt - New Signals with PyQtSignal
- PyQt - Connecting, Disconnecting, & Emitting Signals
- PyQt - Slot decorator
- PyQt - Slot Connection
- PyQt Layouts
- PyQt - Layout Management
- PyQt - QBoxLayout
- PyQt - QGridLayout
- PyQt - QFormLayout
- PyQt - QHBoxLayout
- PyQt - QVBoxLayout
- PyQt - QStackedLayout
- PyQt - QGraphicsGridLayout
- PyQt - QGraphicsAnchorLayout
- PyQt - QGraphicsLayout
- PyQt - QGraphicsLinearLayout
- PyQt Basic Widgets
- PyQt - Basic Widgets
- PyQt - Qlabel Widget
- PyQt - QLineEdit Widget
- PyQt - QPushButton Widget
- PyQt - QRadioButton Widget
- PyQt - QCheckBox Widget
- PyQt - QComboBox Widget
- PyQt - QSpinBox Widget
- PyQt - QMessageBox
- PyQt - QDialogButtonBox Widget
- PyQt - QFontComboBox Widget
- PyQt - QDoubleSpinBox Widget
- PyQt - QToolBox Widget
- PyQt - QMenuBar, QMenu & Qaction Widgets
- PyQt - QToolTip
- PyQt - QInputDialog Widget
- PyQt - QFontDialog Widget
- PyQt - QDialog Widget
- PyQt - QFileDialog Widget
- PyQt - QTab Widget
- PyQt - QSplitter Widget
- PyQt - QDock Widget
- PyQt - QStatusBar Widget
- PyQt - QTabBar
- PyQt - QList Widget
- PyQt - QScrollBar Widget
- PyQt - QProgressBar
- PyQt - QCalendar Widget
- PyQt - QMessageBox Widget
- PyQt - QPlainTextEdit
- PyQt - QDateEdit
- PyQt - QDateTimeEdit
- PyQt - QTimeEdit
- PyQt - QTextEdit
- PyQt - QTextBrowser
- PyQt - QScrollArea
- PyQt - Drag and Drop
- PyQt - Multiple Document Interface
- PyQt - QDialog Class
- PyQt Views
- PyQt - QColumnView
- PyQt - QTableView
- PyQt Drawing API
- PyQt - Drawing API
- PyQt - Drawing a Line
- PyQt - Drawing a Rectangle
- PyQt - Drawing a Triangle
- PyQt - Drawing a Circle
- PyQt - Drawing a Ellipse
- PyQt - Drawing a Polygon
- PyQt - Geometric Transformation
- PyQt - Drawing Effect
- PyQt Groups
- PyQt - QButtonGroup
- PyQt - QGroupBox
- PyQt Effects
- PyQt - Effects
- PyQt - Opacity Effect
- PyQt - QGraphicsBlur Effect
- PyQt - QGraphicsColorize Effect
- PyQt - QGraphicsDropShadow Effect
- PyQt Events
- PyQt - Event Handling
- PyQt - Drag & Drop Events
- PyQt - File Open Event
- PyQt - Action Event
- PyQt - Hide Event
- PyQt - Resize Event
- PyQt Database
- PyQt - Database Handling
- PyQt Essentials
- PyQt - BrushStyle Constants
- PyQt - QClipboard
- PyQt - QPixmap Class
- PyQt Useful Resources
- PyQt - Quick Guide
- PyQt - Useful Resources
- PyQt - Discussion
PyQt - QLabel Widget
A QLabel object acts as a placeholder to display non-editable text or image, or a movie of animated GIF. It can also be used as a mnemonic key for other widgets. Plain text, hyperlink or rich text can be displayed on the label.
What is Qlabel?
In PyQt, the Qlabel class is used to create label widgets whihc are capable of presenting static text, images, or animated images (GIF) to users. It has a simple interface and powerful capabilities. It is used a fundamental building block for designing other intuitive and visually appealing PyQt applications.
Getting started with Qlabel
To start using the Qlabel widget in your PyQt application, we will need to follows the below basic steps −
Import QLabel
First, import the QLabel widget from the PyQt6.QtWidgets module. This step allows you to access QLabel's functionality within your Python script.
from PyQt6.QtWidgets import QLabel
Create QLabel Instance
In this step, instantiate a new QLabel object. You can specify the initial text to be displayed within the label by passing it as an argument to the QLabel constructor.
label = QLabel('This is a QLabel widget')
Customize QLabel (Optional)
PyQt enables you to further customize the QLabel widget by using methods such as setText() to dynamically change the displayed text.
Displaying QLabel
Finally, integrate the QLabel widget into your PyQt application's layout and ensure it is visible to the user.
layout.addWidget(label)
The following table lists the important methods defined in QLabel class −
Given below are the most commonly used methods of QLabel.
| Sr.No. | Methods & Description |
|---|---|
| 1 |
setAlignment() Aligns the text as per alignment constants Qt.AlignLeft Qt.AlignRight Qt.AlignCenter Qt.AlignJustify |
| 2 |
setIndent() Sets the labels text indent |
| 3 |
setPixmap() Displays an image |
| 4 |
Text() Displays the caption of the label |
| 5 |
setText() Programmatically sets the caption |
| 6 |
selectedText() Displays the selected text from the label (The textInteractionFlag must be set to TextSelectableByMouse) |
| 7 |
setBuddy() Associates the label with any input widget |
| 8 |
setWordWrap() Enables or disables wrapping text in the label |
Signals of QLabel Class
| linkActivated | If the label containing embedded hyperlink is clicked, the URL will open. setOpenExternalLinks feature must be set to true. |
| linkHovered | Slot method associated with this signal will be called when the label having embedded hyperlinked is hovered by the mouse. |
Example
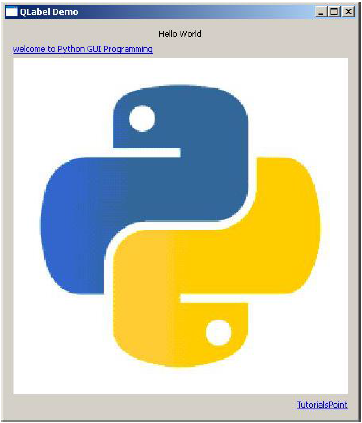
In this example, QLabel objects l2 and l4 have the caption containing hyperlink. setOpenExternalLinks for l2 is set to true. Hence, if this label is clicked, the associated URL will open in the browser. linkHovered signal of l4 is connected to hovered() function. So, whenever the mouse hovers over it, the function will be executed.
QPixmap object prepares offscreen image from python.jpg file. It is displayed as label l3 by using setPixmap() method.
import sys
from PyQt4.QtCore import *
from PyQt4.QtGui import *

def window():
   app = QApplication(sys.argv)
   win = QWidget()

   l1 = QLabel()
   l2 = QLabel()
   l3 = QLabel()
   l4 = QLabel()

   l1.setText("Hello World")
   l4.setText("TutorialsPoint")
   l2.setText("welcome to Python GUI Programming")

   l1.setAlignment(Qt.AlignCenter)
   l3.setAlignment(Qt.AlignCenter)
   l4.setAlignment(Qt.AlignRight)
   l3.setPixmap(QPixmap("python.jpg"))

   vbox = QVBoxLayout()
   vbox.addWidget(l1)
   vbox.addStretch()
   vbox.addWidget(l2)
   vbox.addStretch()
   vbox.addWidget(l3)
   vbox.addStretch()
   vbox.addWidget(l4)

   l1.setOpenExternalLinks(True)
   l4.linkActivated.connect(clicked)
   l2.linkHovered.connect(hovered)
   l1.setTextInteractionFlags(Qt.TextSelectableByMouse)
   win.setLayout(vbox)

   win.setWindowTitle("QLabel Demo")
   win.show()
   sys.exit(app.exec_())

def hovered():
   print "hovering"
def clicked():
   print "clicked"

if __name__ == '__main__':
   window()
Output
The above code produces the following output −
Let's see some example and understand how we can use Qlabel.
Displaying Text with Qlabel
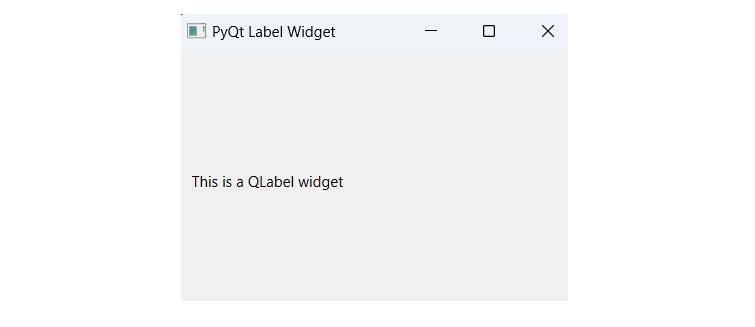
This PyQt6 code defines a simple GUI application with a single window displaying a QLabel widget containing the text "This is a QLabel widget". The window's title is set to "PyQt Label Widget", and it's sized to 320x210 pixels. The QLabel is added to a QVBoxLayout, which is then set as the layout for the window.
Example
Following is the illustration of text display with Qlabel.
import sys
from PyQt6.QtWidgets import QApplication, QWidget, QLabel, QVBoxLayout

class MainWindow(QWidget):
   def __init__(self):
      super().__init__()

      self.setWindowTitle('PyQt Label Widget')
      self.setGeometry(100, 100, 320, 210)

      label = QLabel('This is a QLabel widget')

      layout = QVBoxLayout()
      layout.addWidget(label)
      self.setLayout(layout)

      self.show()

if __name__ == '__main__':
   app = QApplication(sys.argv)
   window = MainWindow()
   sys.exit(app.exec())
Output
The above code produces the following output −
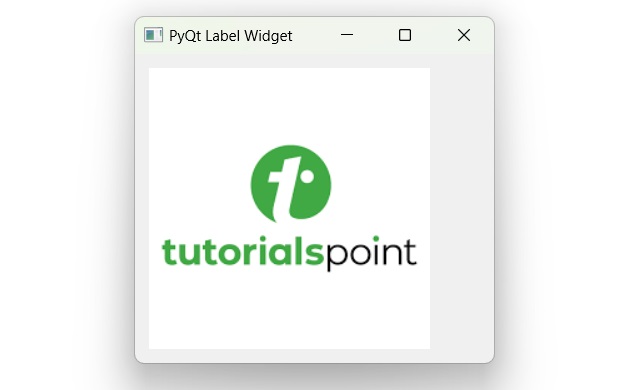
Displaying an Image with QLabel
To display an image with Qlabel, follow the below steps −
- Import QPixmap from PyQt6.QtGui.
- Create a QPixmap object with the path to the image file.
- Create a QLabel widget and set the pixmap using setPixmap().
Example
Following is the illustration simple image with QLabel.
import sys
from PyQt6.QtWidgets import QApplication, QWidget, QLabel, QVBoxLayout
from PyQt6.QtGui import QPixmap

class MainWindow(QWidget):
   def __init__(self):
      super().__init__()

      self.setWindowTitle('PyQt Label Widget')
      self.setGeometry(100, 100, 320, 210)

      label = QLabel()
      pixmap = QPixmap('C:\\Users\\Lenovo\\Downloads\\tp-logo.png')
      label.setPixmap(pixmap)

      layout = QVBoxLayout()
      layout.addWidget(label)
      self.setLayout(layout)

      self.show()

if __name__ == '__main__':
   app = QApplication(sys.argv)
   window = MainWindow()
   sys.exit(app.exec())
Output
The above code produces the following output −
Displaying an Animated Image with QLabel
This PyQt6 code creates a GUI window titled "PyQt QLabel Widget" with dimensions 320x210 pixels. It displays an animated GIF ('python.gif') using a QLabel widget powered by QMovie. The GIF is added to a QVBoxLayout, which serves as the window's layout, and the application enters the main event loop until the window is closed, ensuring continuous animation playback.
Example
Following is the illustration of animated image with Qlabel.
import sys
from PyQt6.QtWidgets import QApplication, QWidget, QLabel, QVBoxLayout
from PyQt6.QtGui import QMovie

class MainWindow(QWidget):
   def __init__(self):
      super().__init__()

      self.setWindowTitle('PyQt QLabel Widget')
      self.setGeometry(100, 100, 320, 210)

      label = QLabel()
      movie = QMovie('C:\\Users\\Lenovo\\Downloads\\geometric.gif')
      label.setMovie(movie)
      movie.start()

      layout = QVBoxLayout()
      layout.addWidget(label)
      self.setLayout(layout)

      self.show()

if __name__ == '__main__':
   app = QApplication(sys.argv)
   window = MainWindow()
   sys.exit(app.exec())
Output
The above code produces the following output −