- PyQt - Home
- PyQt - Introduction
- PyQt - Environment
- PyQt - Hello World
- PyQt - Major Classes
- PyQt - Using Qt Designer
- PyQt - Meta Objects
- PyQt Signals & Slots
- PyQt - Signals and Slots
- PyQt - Support and Signals
- PyQt - Unbound and Bound Signals
- PyQt - New Signals with PyQtSignal
- PyQt - Connecting, Disconnecting, & Emitting Signals
- PyQt - Slot decorator
- PyQt - Slot Connection
- PyQt Layouts
- PyQt - Layout Management
- PyQt - QBoxLayout
- PyQt - QGridLayout
- PyQt - QFormLayout
- PyQt - QHBoxLayout
- PyQt - QVBoxLayout
- PyQt - QStackedLayout
- PyQt - QGraphicsGridLayout
- PyQt - QGraphicsAnchorLayout
- PyQt - QGraphicsLayout
- PyQt - QGraphicsLinearLayout
- PyQt Basic Widgets
- PyQt - Basic Widgets
- PyQt - Qlabel Widget
- PyQt - QLineEdit Widget
- PyQt - QPushButton Widget
- PyQt - QRadioButton Widget
- PyQt - QCheckBox Widget
- PyQt - QComboBox Widget
- PyQt - QSpinBox Widget
- PyQt - QMessageBox
- PyQt - QDialogButtonBox Widget
- PyQt - QFontComboBox Widget
- PyQt - QDoubleSpinBox Widget
- PyQt - QToolBox Widget
- PyQt - QMenuBar, QMenu & Qaction Widgets
- PyQt - QToolTip
- PyQt - QInputDialog Widget
- PyQt - QFontDialog Widget
- PyQt - QDialog Widget
- PyQt - QFileDialog Widget
- PyQt - QTab Widget
- PyQt - QSplitter Widget
- PyQt - QDock Widget
- PyQt - QStatusBar Widget
- PyQt - QTabBar
- PyQt - QList Widget
- PyQt - QScrollBar Widget
- PyQt - QProgressBar
- PyQt - QCalendar Widget
- PyQt - QMessageBox Widget
- PyQt - QPlainTextEdit
- PyQt - QDateEdit
- PyQt - QDateTimeEdit
- PyQt - QTimeEdit
- PyQt - QTextEdit
- PyQt - QTextBrowser
- PyQt - QScrollArea
- PyQt - Drag and Drop
- PyQt - Multiple Document Interface
- PyQt - QDialog Class
- PyQt Views
- PyQt - QColumnView
- PyQt - QTableView
- PyQt Drawing API
- PyQt - Drawing API
- PyQt - Drawing a Line
- PyQt - Drawing a Rectangle
- PyQt - Drawing a Triangle
- PyQt - Drawing a Circle
- PyQt - Drawing a Ellipse
- PyQt - Drawing a Polygon
- PyQt - Geometric Transformation
- PyQt - Drawing Effect
- PyQt Groups
- PyQt - QButtonGroup
- PyQt - QGroupBox
- PyQt Effects
- PyQt - Effects
- PyQt - Opacity Effect
- PyQt - QGraphicsBlur Effect
- PyQt - QGraphicsColorize Effect
- PyQt - QGraphicsDropShadow Effect
- PyQt Events
- PyQt - Event Handling
- PyQt - Drag & Drop Events
- PyQt - File Open Event
- PyQt - Action Event
- PyQt - Hide Event
- PyQt - Resize Event
- PyQt Database
- PyQt - Database Handling
- PyQt Essentials
- PyQt - BrushStyle Constants
- PyQt - QClipboard
- PyQt - QPixmap Class
- PyQt Useful Resources
- PyQt - Quick Guide
- PyQt - Useful Resources
- PyQt - Discussion
PyQt - Opacity Effect
Opacity defines the level of transparency of any particular element. You may have heard of this property in web technology i.e. CSS which uses the property of opacity with its value.
In PyQt, we can implement a GUI technique that correlates the property of transparency. The effect of opacity in GUI is established through the class QGraphicsOpacityEffect which can be used to set the transparency level.
Here, we have two functions to explore the opacity effect in PyQt −
- setOpacity(opacity) − This function sets the opacity effect.
- setOpacityMask(mask) − This function hold the opacity mask of the effect. Using opacity mask allows users to apply opacity on selective element.
Benefits of using QGraphicsOpacityEffect
Following are some key benefit of using QGraphicsOpacityEffect −
- Subtle Animations − We can create smooth animation for UI element(fade-in and face-out) that enhance the user experience.
- Depth and Layer − Adjusting of opacity can be achieved through layering effects. For instance, we can overlap text on an image with reduced opacity to create depth.
- Highlighting − The effect of opacity reduce to highlight specific element like tooltip and pop-ups.
- Visual Effect − The visual effect intracts the desktop application. This appeal the effects like glass panel, frosted glass, and transulent overlays.
Now, we can create a simple PyQt program to demonstrate the setOpacity() function.
Example 1
In this example, we illustrate the opacity effect on text using PyQt.
import sys
from PyQt6.QtWidgets import QApplication, QLabel,
QGraphicsOpacityEffect, QVBoxLayout, QWidget

app = QApplication(sys.argv)
window = QWidget()
layout = QVBoxLayout()

label = QLabel("Welcome to Tutorialspoint")
opacity_effect = QGraphicsOpacityEffect()
# set the opacity
opacity_effect.setOpacity(0.7)
label.setGraphicsEffect(opacity_effect)

layout.addWidget(label)
window.setLayout(layout)
window.show()

sys.exit(app.exec())
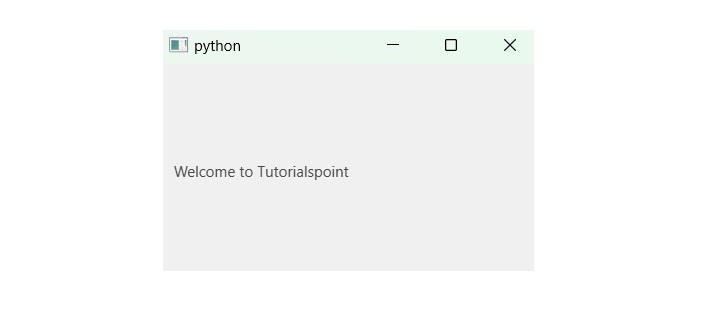
Output
The above code produces the following output −
Example 2
In this example, we illustrate the opacity effect on images in PyQt.
import sys
from PyQt6.QtWidgets import QApplication, QLabel,
QGraphicsOpacityEffect, QVBoxLayout, QWidget
from PyQt6.QtGui import QPixmap

app = QApplication(sys.argv)
window = QWidget()
layout = QVBoxLayout()

# Set the path
image_path = 'C:/Users/Lenovo/Downloads/tutorialspoint.png'
image_label = QLabel()
image_pixmap = QPixmap(image_path)
image_label.setPixmap(image_pixmap)

# Create a QGraphicsOpacityEffect
opacity_effect = QGraphicsOpacityEffect()
# Setting Opacity
opacity_effect.setOpacity(0.5)
image_label.setGraphicsEffect(opacity_effect)

layout.addWidget(image_label)
window.setLayout(layout)
window.show()

sys.exit(app.exec())
Output
The above code produces the following output −
