- Power BI - Home
- Power BI - Introduction
- Power BI - Installation Steps
- Power BI - Architecture
- Power BI Desktop
- Power BI - Desktop
- Power BI - Desktop Window
- Power BI Service
- Power BI - Window Supported Browsers
- Power BI - Generating Reports
- Power BI Desktop Service
- Power BI - Desktop vs Service
- Power BI - Supported Data Sources
- Power BI - Comparison Tools
- Power Query Editor
- Power Query Editor - Introduction
- Power Query Editor - Data Discrepancy
- Power Query Editor - Merge Queries (Part 1)
- Power Query Editor - Merge Queries (Part 2)
- Power BI - Develop Star Schema
- Data Modeling Concepts
- Power BI - Data Modeling
- Power BI - Manage Relationships
- Power BI - Cardinality
- Power BI - Dashboard Options
- Power BI Report Visualizations
- Power BI - Visualization Options
- Power BI - Visualization Charts
- Power BI - Stacked Bar Chart
- Power BI - Stacked Column Chart
- Power BI - Clustered Chart
- Power BI - 100% Stacked Chart
- Power BI - Area Chart and Stacked Area Chart
- Power BI - Line and Stacked Column Chart
- Power BI - Line and Clustered Column Chart
- Power BI - Ribbon Chart
- Power BI - Table and Matrix Visuals
- Power BI Map Visualizations
- Power BI - Creating Map Visualizations
- Power BI - ArcGIS Map
- Power BI Miscellaneous
- Power BI - Waterfall Charts
- Funnel Charts and Radial Gauge Chart
- Power BI - Scatter Chart
- Power BI - Pie Chart and Donut Chart
- Power BI - Card and Slicer Visualization
- Power BI - KPI Visual
- Power BI - Smart Narrative Visual
- Power BI - Decomposition Tree
- Power BI - Paginated Report
- Power BI - Python Script & R Script
- Power BI - Multi-row Card
- Power BI - Power Apps & Power Automate
- Power BI - Excel Integration
- Power BI Dashboard
- Power BI - Sharing Dashboards
- Power BI Sales Production Dashboard
- Power BI - HR Analytics Dashboard
- Power BI - Customer Analytics Dashborad
- Power BI - DAX Basics
- Power BI - Administration Role
- Power BI - DAX Functions
- Power BI - DAX Text Functions
- Power BI - DAX Date Functions
- Power BI - DAX Logical Functions
- Power BI - DAX Counting Functions
- Power BI - Depreciation Functions
- Power BI - DAX Information Functions
Power BI - Installation Steps
In this tutorial, we will install a Power BI desktop application. To check the system requirements, and installation file details, users have to navigate to the official Microsoft website. The following are the system requirements to download the Power BI tool −
Supported Operating Systems
- Windows 10, Windows 7, Windows 8, Windows 8.1, Windows Server 2008 R2, Windows Server 2012, Windows Server 2012 R2.
- Microsoft Power BI Desktop requires Internet Explorer 9 or higher.
- Microsoft Power BI Desktop is available for 32-bit (x86) and 64-bit (x64) platforms.
Installing Power BI on Windows
Step 1 − Type "Power BI download" in the Google search engine and click on the first link https://powerbi.microsoft.com/en-us/downloads/. We have two ways to download Microsoft Power BI desktop either from app store or through Advanced download options. Click on the Download that redirects the page to the Microsoft app store.
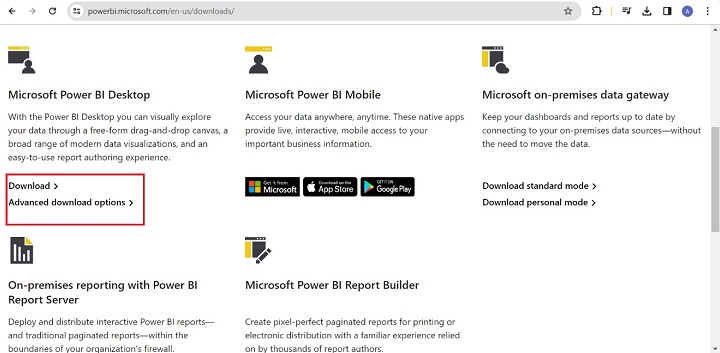
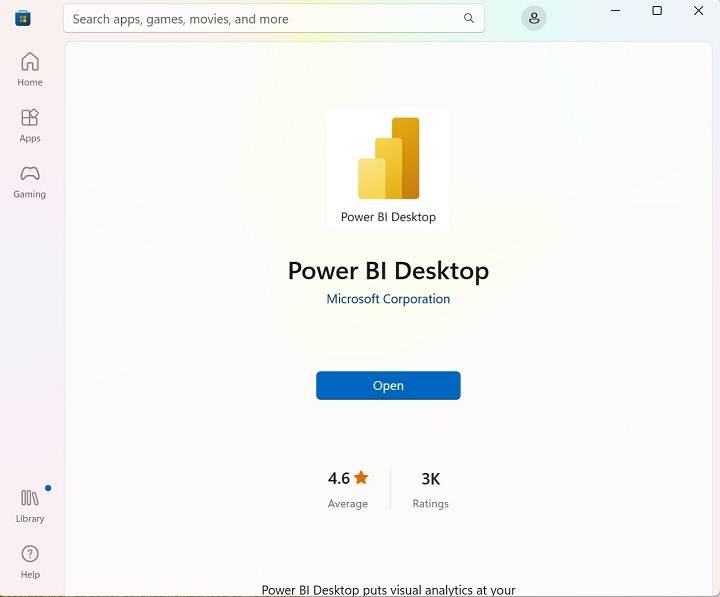
Step 2 − You may install and open Power BI desktop from app store.
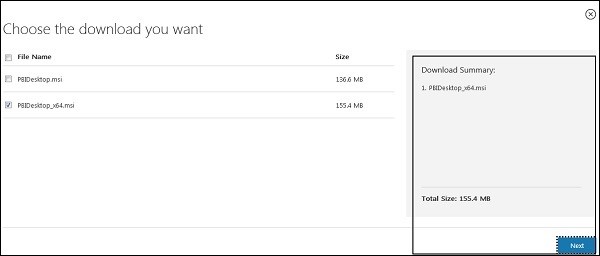
Step 3 − Another frequent way to install Power BI desktop is to click on the "Advance download options". Users can select a language in which they want to install Power BI and the following files are available for download. In this tutorial, we will select English language and click on Download.
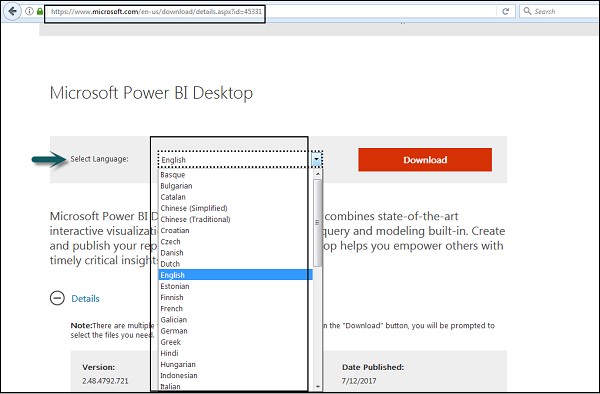
Step 4 − This is the link to directly download Power BI files −
https://www.microsoft.com/en-us/download/details.aspx?id=45331
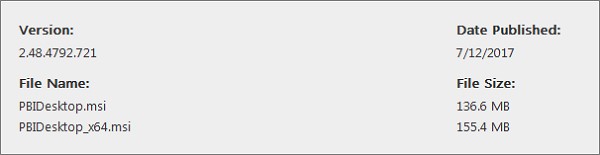

PBIDesktop_x64.msi shows a 64-bit OS file. Select the file you want to install as per OS type and click Next. Save the installation file on the local drive.
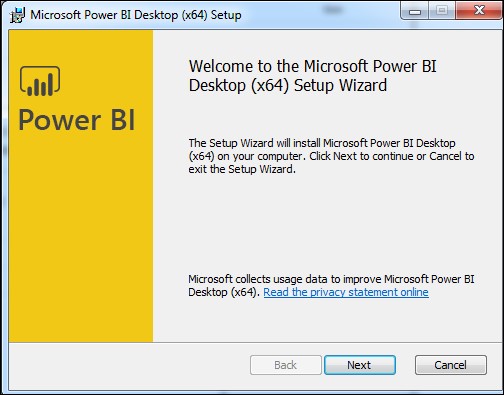
Step 5 − Once the Power BI installer is downloaded. You need to run the executable file from the Download folder.

Step 6 − The following screen is displayed and click on Next.
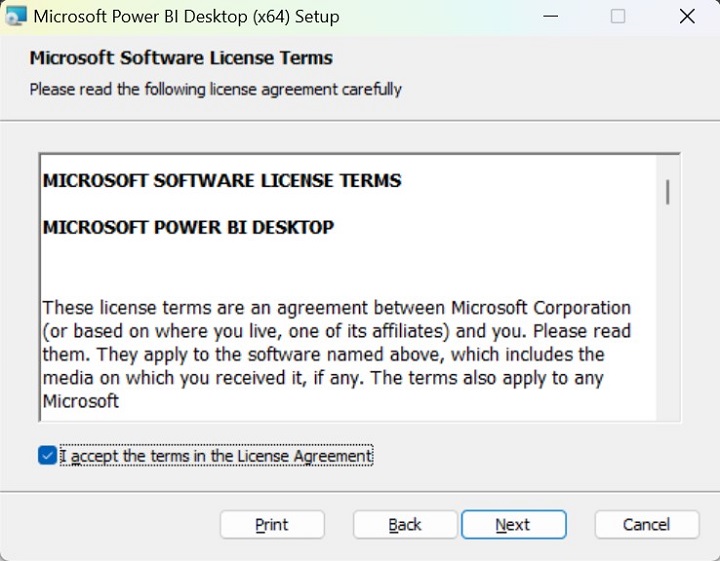
Step 7 − Then, accept the license agreement and follow the instructions on the screen to finish the installation and click on the Next button.
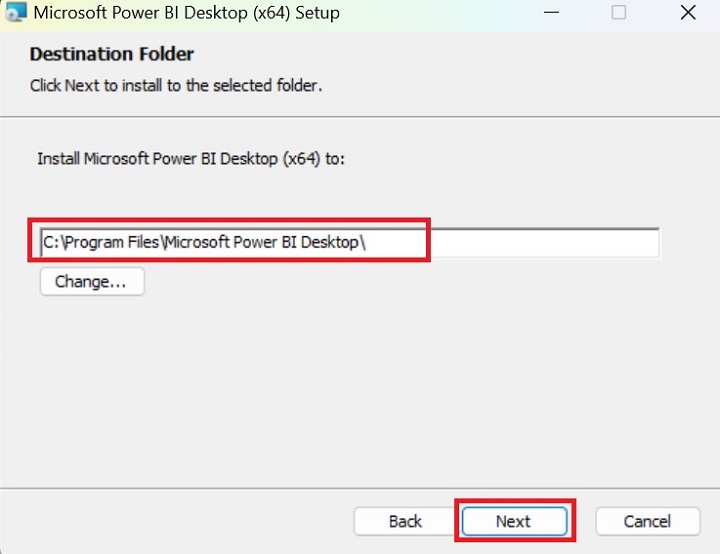
Step 8 − Furthermore, set the specific folder location in the system where the Power BI desktop tool would be installed and click on the Next button.
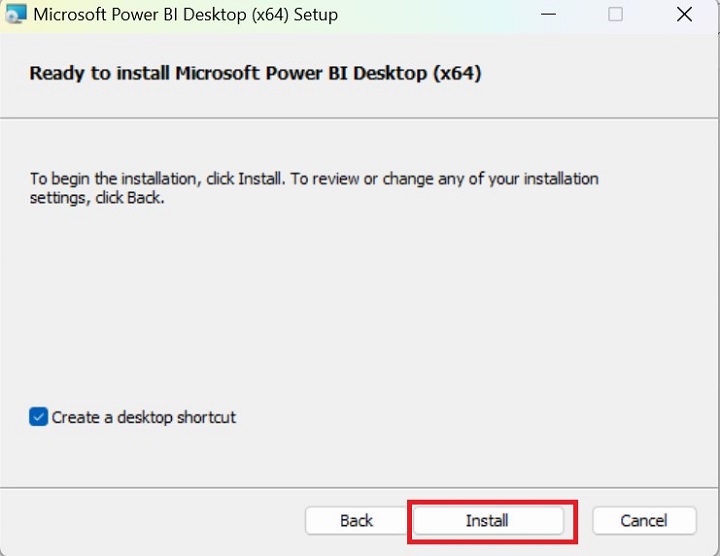
Step 9 − Now, we are ready to install Power BI desktop, click on the Install button.
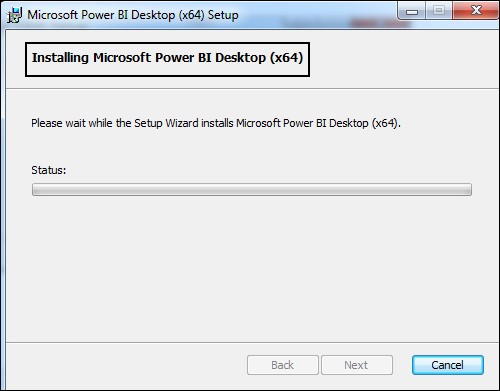
The setup wizard installs the Power BI desktop within a few minutes.
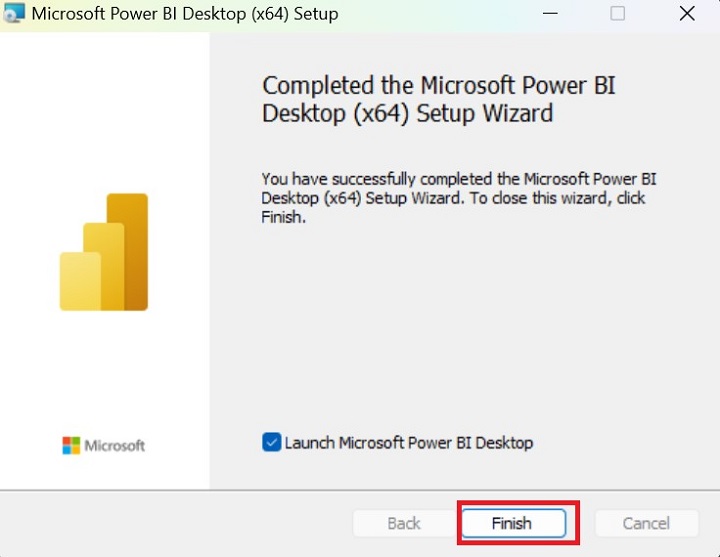
Step 10 − This is a last setup screen and select the Finish for successfully completion of Power BI desktop.
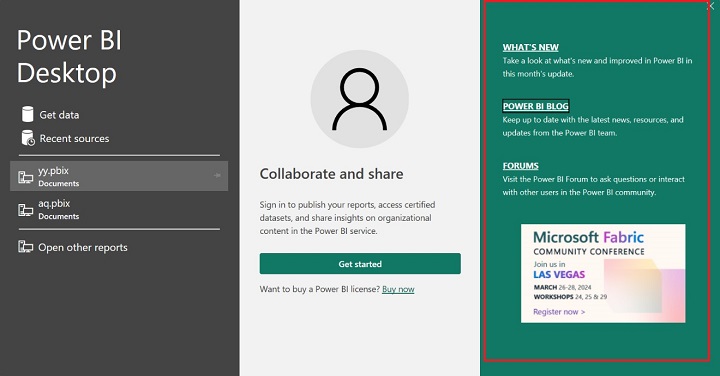
Step 11 − When Power BI is installed, it launches a welcome screen. This screen is used to launch different options related to getting data, enriching the existing data models, creating reports as well as publishing and sharing reports.

Let's have a look at individual option of welcome screen one by one.
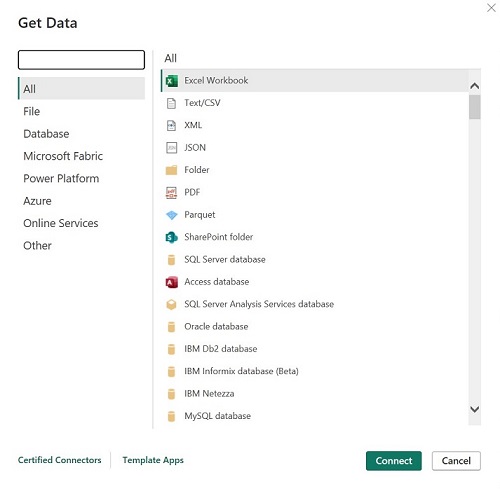
Get Data
When users click on Get Data it permits users to redirect to different sources to connect with data. You may select any of the sources like Azure, Microsoft Fabric, File, and Database as per your business requirements.
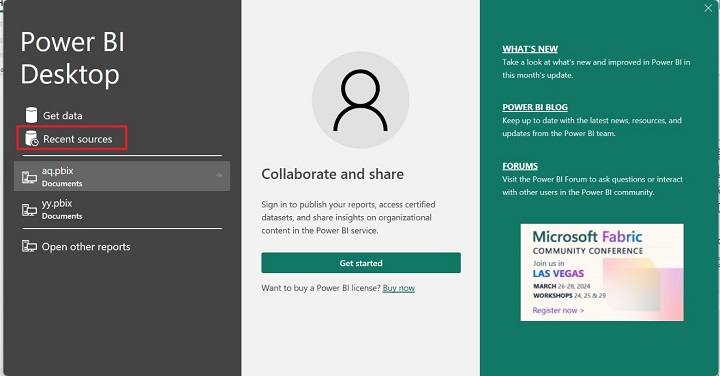
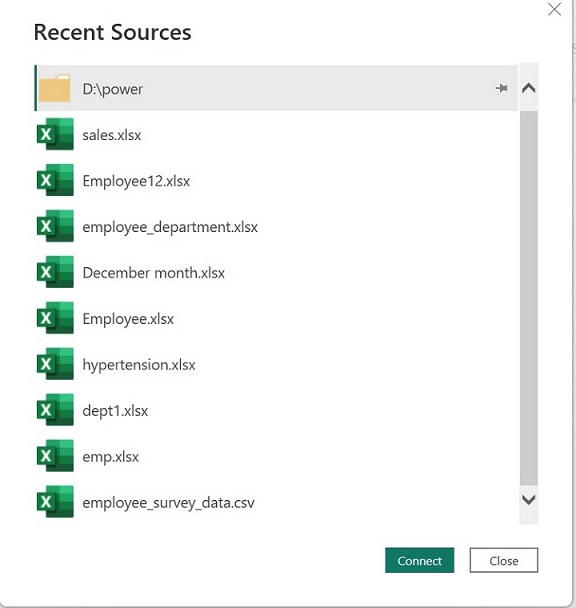
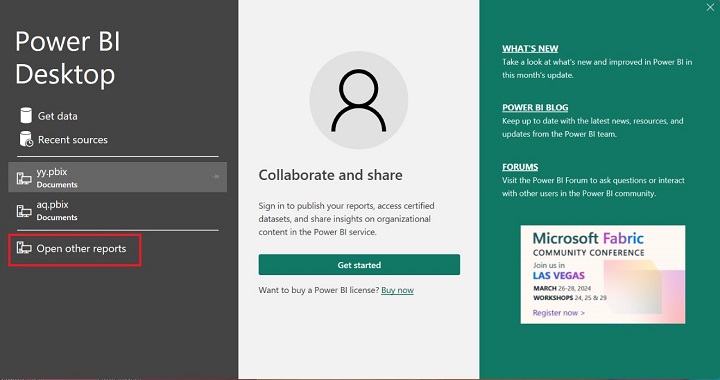
Recent Sources
It displays the list of files that have recently and previously been opened in the Power BI desktop. Despite searching the folder path in the system, users may choose this option to render the same file.
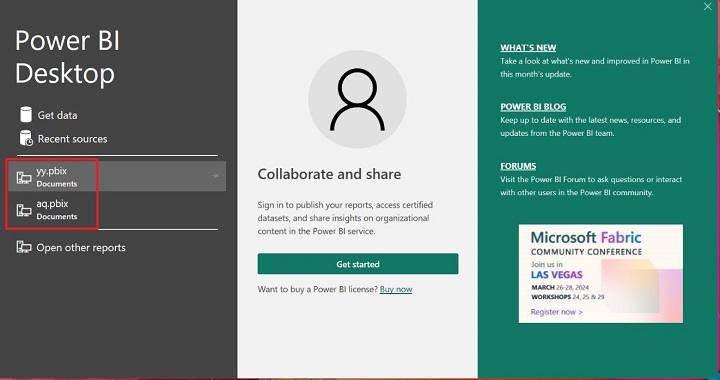
Saved Reports
You may also reopen the saved power BI files for further exploration and inspection. If you click on the yy.pbix, that report will open again.
Open Other Reports
You may also select the folder path to load the files by using this option. Click open to import the specific file.

Publishing Report
You can interact together, share your reports, and view organizational reports where an official login ID is required in the Power BI service.
The third section facilitates a few links related to monthly updates of Power BI, forums, and the Power BI blog. Users may get to know recent updates related to these tools.