- Computer Graphics - Home
- Computer Graphics Basics
- Computer Graphics Applications
- Graphics APIs and Pipelines
- Computer Graphics Maths
- Sets and Mapping
- Solving Quadratic Equations
- Computer Graphics Trigonometry
- Computer Graphics Vectors
- Linear Interpolation
- Computer Graphics Devices
- Cathode Ray Tube
- Raster Scan Display
- Random Scan Device
- Phosphorescence Color CRT
- Flat Panel Displays
- 3D Viewing Devices
- Images Pixels and Geometry
- Color Models
- Line Generation
- Line Generation Algorithm
- DDA Algorithm
- Bresenham's Line Generation Algorithm
- Mid-point Line Generation Algorithm
- Circle Generation
- Circle Generation Algorithm
- Bresenham's Circle Generation Algorithm
- Mid-point Circle Generation Algorithm
- Ellipse Generation Algorithm
- Polygon Filling
- Polygon Filling Algorithm
- Scan Line Algorithm
- Flood Filling Algorithm
- Boundary Fill Algorithm
- 4 and 8 Connected Polygon
- Inside Outside Test
- 2D Transformation
- 2D Transformation
- Transformation Between Coordinate System
- Affine Transformation
- Raster Methods Transformation
- 2D Viewing
- Viewing Pipeline and Reference Frame
- Window Viewport Coordinate Transformation
- Viewing & Clipping
- Point Clipping Algorithm
- Cohen-Sutherland Line Clipping
- Cyrus-Beck Line Clipping Algorithm
- Polygon Clipping Sutherland–Hodgman Algorithm
- Text Clipping
- Clipping Techniques
- Bitmap Graphics
- 3D Viewing Transformation
- 3D Computer Graphics
- Parallel Projection
- Orthographic Projection
- Oblique Projection
- Perspective Projection
- 3D Transformation
- Rotation with Quaternions
- Modelling and Coordinate Systems
- Back-face Culling
- Lighting in 3D Graphics
- Shadowing in 3D Graphics
- 3D Object Representation
- Represnting Polygons
- Computer Graphics Surfaces
- Visible Surface Detection
- 3D Objects Representation
- Computer Graphics Curves
- Computer Graphics Curves
- Types of Curves
- Bezier Curves and Surfaces
- B-Spline Curves and Surfaces
- Data Structures For Graphics
- Triangle Meshes
- Scene Graphs
- Spatial Data Structure
- Binary Space Partitioning
- Tiling Multidimensional Arrays
- Color Theory
- Colorimetry
- Chromatic Adaptation
- Color Appearance
- Antialiasing
- Ray Tracing
- Ray Tracing Algorithm
- Perspective Ray Tracing
- Computing Viewing Rays
- Ray-Object Intersection
- Shading in Ray Tracing
- Transparency and Refraction
- Constructive Solid Geometry
- Texture Mapping
- Texture Values
- Texture Coordinate Function
- Antialiasing Texture Lookups
- Procedural 3D Textures
- Reflection Models
- Real-World Materials
- Implementing Reflection Models
- Specular Reflection Models
- Smooth-Layered Model
- Rough-Layered Model
- Surface Shading
- Diffuse Shading
- Phong Shading
- Artistic Shading
- Computer Animation
- Computer Animation
- Keyframe Animation
- Morphing Animation
- Motion Path Animation
- Deformation Animation
- Character Animation
- Physics-Based Animation
- Procedural Animation Techniques
- Computer Graphics Fractals
Lighting 3D Graphics Robotics in Computer Graphics
3D graphics is more than just transferring 2D to 3D. There are many such concepts involved in it. In the last couple of chapters, we covered concepts such as hidden surface removal, modelling coordinates, etc. But no 3D design is useful without lighting and shading.
Lighting adds realism and depth by simulating how light interacts with surfaces. Lighting, along with shading, is used to determine the color and brightness of objects in 3D scenes.
In this chapter, we will see the concept of lighting in 3D graphics, covering its basic definitions and examples of various lighting models and shading techniques for a better understanding.
Shading and Lighting Basics
Lighting is related to the concept of shading. It's important to understand shading before lighting models. Shading refers to the process of calculating the color of individual pixels in a 3D scene. There is a concept called fragment shader in graphics programming and this is responsible for this task. It takes the geometry that has already been rasterized and determines what color each pixel should have. This can be done with surface normals, material properties, and light direction.
There are two key components involved in the process −
- Shading Model − Determines how and when light calculations are performed.
- Lighting Model − Determines how light interacts with a surface to produce the final color.
Types of Light Sources
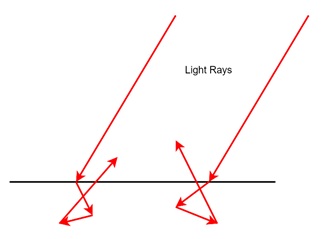
Light sources could be different, majorly they are classified as Point Light Source and Directional Light Source.
Point Light Source
This light source emits light from a single point in space. It radiates light in all directions, and its intensity diminishes as the distance from the source increases.
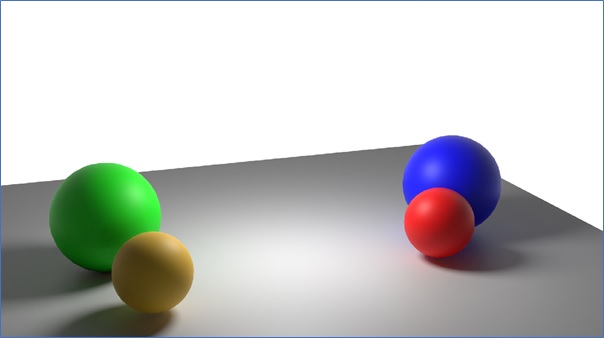
Here, the light is at the center with a certain heigh, and rays are spreading in all directions equally.
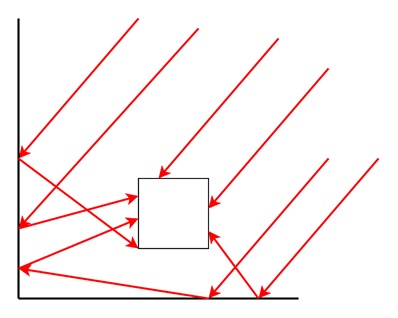
Directional Light Source
In contrast, a directional light source emits light uniformly in a specific direction. This type of light can be imagined as coming from a very distant source, like sunlight, where the light rays are considered parallel.
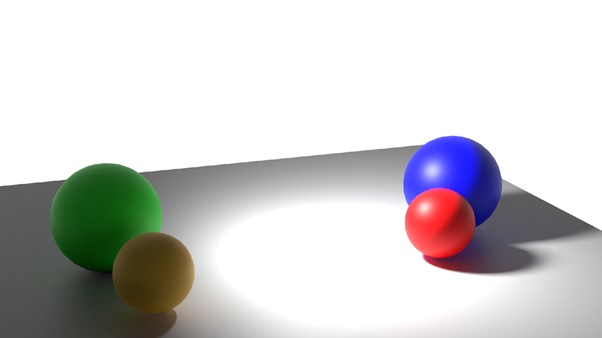
Here, the same environment is used, the light is at same position but it is directional area light. It is throwing light rays in a directed way.
Shading Models
There are three main shading models commonly used in 3D graphics, each with its own use cases and advantages.
1. Flat Shading (Per Polygon)
Flat shading is the simplest form of shading. A single color is applied uniformly across each polygon in the object, based on a single surface normal. This shading model is efficient and fast, but it does not handle smooth transitions between colors very well. As a result, flat shading is most appropriate for objects with flat surfaces, such as cubes or other geometric shapes.
2. Gouraud Shading (Per Vertex)
Gouraud shading is more sophisticated than flat shading. It calculates color at each vertex and then interpolates the color across the surface of the polygon. This produces a smoother gradient of color across the object, which is especially useful for curved surfaces.

Gouraud shading doesnt handle specular reflections well, as these reflections may occur inside a polygon, but not necessarily on any of the vertices.
3. Phong Shading (Per Fragment)
Phong shading improves upon Gouraud shading by calculating the color at each pixel (or fragment) rather than at the vertices. The surface normal is interpolated between vertices, and the final color is computed for each pixel based on this interpolated normal. Phong shading is ideal for objects with specular highlights, as it provides more accurate and detailed lighting.
We will see these two shading modes in detail in later articles.
Lambert Lighting Model (Diffuse Reflection)
Let us start the idea of lighting. The Lambert lighting model is one of the most common models for simulating diffuse reflection. Here the light is scattered equally in all directions from a surface. This is how most surfaces behave in the real world. In the Lambert model, the intensity of the light that a surface reflects is determined by the angle at which the light hits the surface.
The amount of light reflected depends on the angle between the surface normal and the direction of the light. When the light hits the surface at a perpendicular angle, the surface reflects the most light. As the angle becomes shallower, less light is reflected.
The formula used to calculate the diffuse reflection is based on the dot product of the surface normal and the light direction. This is a simple and efficient way to determine how much light a surface receives.
For example, if the angle between the light direction and the surface normal is 0 degrees, the surface receives 100% of the light. If the angle is 30 degrees, the surface receives around 87% of the light. At 45 degrees, the surface receives about 71% of the light.
Ambient Lighting
In reality, the light does not only come from a single source. Light reflects off surrounding objects and scatters in different directions. It is illuminating areas that arent directly lit. This phenomenon is called indirect illumination.
In most 3D graphics applications, fully calculating indirect illumination can be computationally expensive. Instead, a simpler approximation is used: ambient lighting. Ambient lighting adds a constant amount of light to every surface. It ensures the shadowed parts of objects aren't completely black. This is a rough approximation but helps give scenes a more natural appearance.
Example
Imagine a cube where one side is directly lit by a light source. Without ambient lighting, the opposite side of the cube would be completely dark. Adding ambient light allows you to see the unlit side, making it look more realistic.
Phong Lighting Model (Specular Reflection)
Another model is the Phong lighting model. This addresses the issue of specular reflections on surfaces, particularly shiny or metallic ones. These reflections occur when light reflects in a specific direction, often resulting in bright highlights.
The model calculates specular highlights based on the angle between the viewer's direction and the reflected light direction. The closer the two directions are, the stronger the specular highlight.
A shininess factor is also applied to control the sharpness of the highlight. A low shininess value produces a large, blurry highlight, typical of materials like plastic, while a high shininess value produces a small, sharp highlight, common of metal.
Conclusion
In this chapter, we covered the concept of lighting in 3D graphics. We have seen the basics of shading and lighting, understood its key terms like point and directional light sources. We then moved on to different shading models, including flat shading, Gouraud shading, and Phong shading in brief.
The chapter also covered the Lambert lighting model for diffuse reflections and the role of ambient lighting in approximating indirect illumination. Finally, we explained the Phong lighting models, which are used to simulate specular reflections.